This is such a "sweet" project! I found this idea on Pinterest (my favorite place) and have been dying to give it a try, and now I have reason! A friend of mine's daughter is having a sweet baby girl soon and I thought this would make a great gift! I actually did Baby Blanket and Onsie Cupcakes and Washcloth Lollipops (the tutorial is in Part 2). What you need for the entire project (lollipops and cupcakes) is as follows...
4 Receiving Blankets (mine are 30x30)
4 Onsies
4 Washcloths
Clear Tape
Hot glue gun and glue
Around 20 Large Coffee Filters
Scissors
Ribbon
Bakery Box
Measuring Tape (optional)
4 Rubber Bands
Floral Wire (optional)
Cellophane Bags or Shrink Wrap
Lollipop Sticks
Vinyl (optional)
And here is what you need if your just planning on doing the Cupcakes.
4 Receiving Blankets
4 Onsies
4 Rubberbands
Around 20 large Coffee Filters
Ribbon
Bakery Box
Vinyl (optional)
Scissors
To start unroll your blanket (its probably already around 8in wide). You will need to fold the top down around and then the bottom up to make your width around 3 inches. I played around with doing them a little bigger but they did not seem to fit in the coffee filters as well.
Next lay your onsie out and grab it around the "belly button" area. Pick it up so the top and bottom are touching and wrap your hand around the middle. This is going to make your "ICING".
Now just place your onsie at the beginning of your blanket and begin to roll (its ok if part of the onsie hangs out the bottom). As you roll your cupcake you will want to roll it kind of "cone" shaped to create layers. This is also going to cover up part of the onsie that hangs out of the bottom.
When you are almost done you can stuff the rest of the onsie, that is hanging out of the bottom, up into the "cupcake".
After you finish rolling I tuck in the very last part of the blanket to create a smooth ending point. I use some clear tape to secure it then place a rubber band around the base to really secure it.
Now sit your cupcake into the coffee filters, I use around 4-5 coffee filters for each cupcake, I just think that looks better. Also just an FYI, I tried to dye my coffee filters a pretty pink color prior to making my cupcakes. It worked great and they looked very pretty but when they dry they loose the shape of the coffee filter (which in my opinion makes them really look like cupcake holders). So I just stuck with plain white and did a pretty ribbon. But feel free to try other stuff, and let me know how it goes! Then just tie a pretty ribbon around the outside of the coffee filter to keep it in place.
Okay now just repeat the process 3 more times (or how ever many more cupcakes your making) and your almost done. Now for the box I used one of the lace paper doilies for the bottom and then just sat my cupcakes inside. SO CUTE!
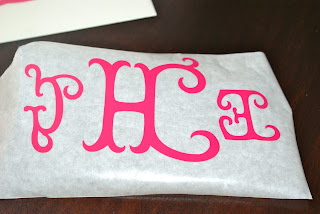
Now for a little personalization. I used my Cricut and the Story Book Cartridge to cut out the new babies initials in a hot pink vinyl.
Just use some transfer paper (or contact paper or even cling wrap), if you want, to place the lettering on the top of your box. Peel away slowly to make sure it sticks.
Love it!! To add just one more little touch I used a pretty pink ribbon to close the lid to the box. This is not by any means a must do, but I liked it. Just use a small (pen point size) hole punch and put a hole in the lid and front wall of your bakery box.
Thread your ribbon through and tie a bow! Done! Too cute!

Ready to go!
Here are a few pictures of the entire thing put together! I will show how to do the Washcloth Lollipops in The Sweet Shoppe "Part II". This is a must try for your next baby shower!!
Linking up to:


Hey this is great you must come from a very talented familyLOL Love this no kidding proud of you
ReplyDeleteThank you, Thank you! And actually I come from an extremely talented family!! I still have a LOT to learn!!!
ReplyDeleteamasya
ReplyDeleteantalya
antep
ardahan
artvin
DMTBR